
A boutonniere is an elegant addition to any formal occasion, adding a touch of class and sophistication. From prom to wedding, a buttonhole flower can be the perfect icing on the cake for a special event. Making a boutonniere is surprisingly easy. With the right tools and materials, anyone can create their own floral masterpiece. Like the icing on the cake, a custom boutonniere can be the crowning glory of any occasion.
Designing your own boutonniere may seem daunting at first, but with a little patience and attention to detail, it'll quickly become second nature. The basics of designing a boutonniere include choosing the right components and putting them together harmoniously. A striking main flower serves as the centerpiece of the arrangement, surrounded by accents and foliage that complete the overall look. Putting these components together is like putting puzzle pieces together - when you have them all in place, the finished product will be a stunning work of art!
Don't be afraid to take on this challenge - with a little preparation and knowledge, you'll have your very own unique bouquet in no time! Let's take a closer look at how to put together your own boutonniere for a special occasion. With a few simple steps, you'll master this craft in no time - so buckle up and let's start the journey to perfection!
Table of Contents
1. Gather Your Materials 2. Select Your Flowers 3. Prepare Your Flowers 4. Arrange Your Flowers 5. Fasten Your Flowers 6. Add Greenery And Other Accents 7. Secure The Boutonniere Care For Your Boutonniere Frequently Asked Questions What Type Of Fastener Should I Use? How Long Will The Boutonniere Last? Can I Make A Boutonniere Ahead Of Time? What Type Of Greenery Should I Use? Should I Use A Pin To Attach The Boutonniere? Conclusion
1. Gather Your Materials
The first step in making a boutonniere is to gather the appropriate materials. This can be an exciting process in itself, as the thought of a beautifully designed corsage fires the imagination. To get started, you'll need a few basic items: scissors, wire cutters, florist tape, beaded head pins and artificial flowers or fresh blooms. The choice of leaves and filler will also enhance the beauty of the finished product.
Assembling these items is similar to gathering ingredients for a recipe; each item has its own purpose and contributes to the overall result. For example, the stems are shaped with wire cutters to make them easier to arrange, while they are held in place with tape. Bead head needles and scissors help create precise cuts and shapes around each petal.
Finally, leaves can be used to add texture and visual interest, while filler material provides additional color contrast. Once you have all of these materials on hand, you can get to work choosing the flowers.
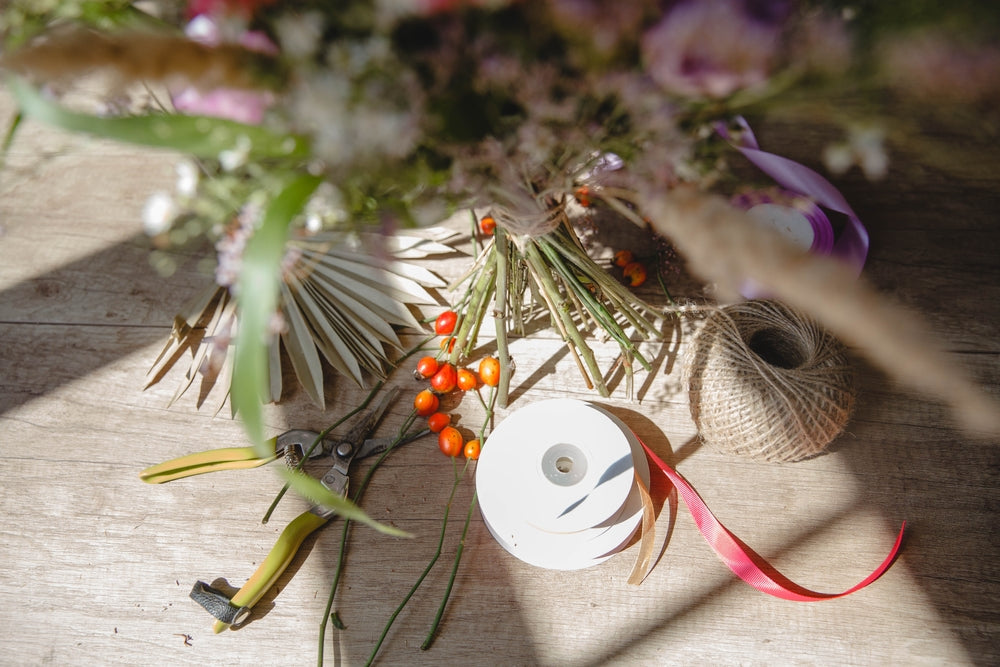
Image from Shutterstock.com
2. Select Your Flowers
When choosing flowers for a corsage, there are a variety of options. Depending on the occasion and desired esthetic, different types of flowers can be used to create a buttonhole flower that stands out from the crowd. For example, a simple daisy or carnation can be used for an informal event like a family reunion or picnic. For more formal occasions like weddings, roses are often chosen to match the bridal bouquet. Other popular flowers include baby's breath, lilies and other greenery.
Regardless of the type of flower chosen, color is an important factor when designing a corsage. The most common colors are white and pastel shades such as pink or yellow. However, there are no strict rules for color selection; bright orange hues, bold purple, and even vibrant blue can be used to create an eye-catching piece of floral art. By carefully considering both the type of flowers and the color choices, you can create a unique boutonniere that is perfect for the occasion. After these considerations have been made, it's time to prepare the flowers for assembly.

Image from Shutterstock.com
3. Prepare Your Flowers
The third step in designing a boutonniere is preparing the flowers. This task requires a certain finesse and attention to detail, because the small size of the boutonniere requires that each flower be handled with care. To begin, you should take a little time to prepare the materials needed for this part of the process. These may include scissors, floral tape and thin wire to wrap around the stems.
Once these utensils are gathered, it's time to prepare the individual components of the boutonniere. First, cut off any foliage from the stem that does not fit into the design. Then, use thin wire or florist tape to wrap the flowers that are connected on one stem - this will keep them together when they are attached to the other elements of the corsage flower. Finally, cut each flower stem at an angle so that it can be easily tucked into a foam backing or pinned to clothing without damaging it. Once all of these steps are complete, it's time to arrange your flowers into a beautiful corsage.
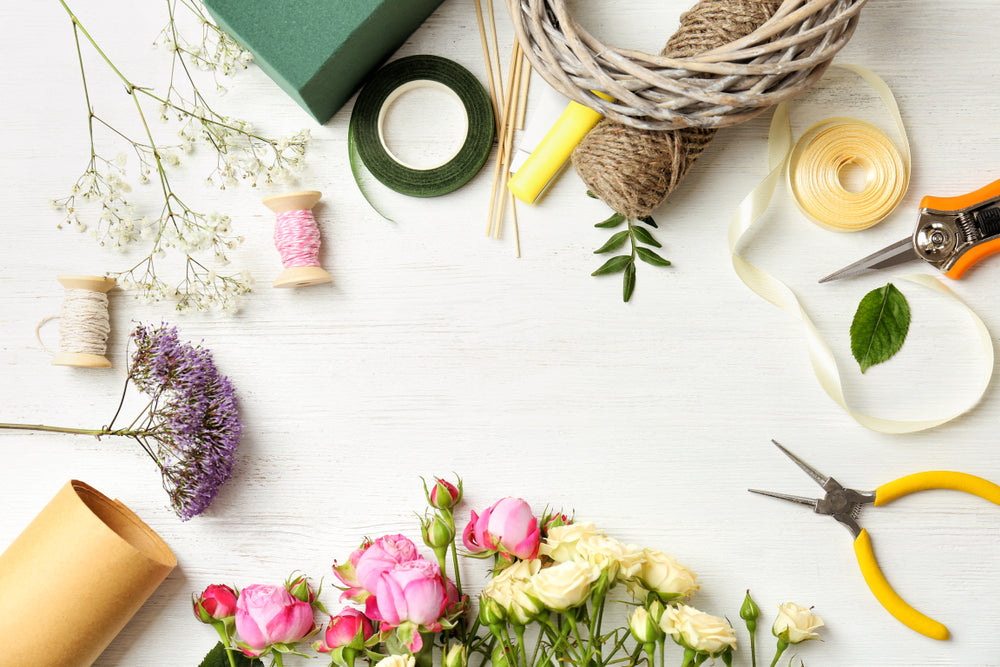
Image from Shutterstock.com
4. Arrange Your Flowers
The next step in designing a boutonniere is to arrange the flowers. This requires an eye for design and a creative mind. You can imagine a florist at a market creating intricate arrangements with bright colors and different textures. Arranging flowers requires careful placement and delicate pruning so that each bloom appears flawless when finished.
To begin, gather all the necessary utensils such as wire cutters, floral tape, scissors and ribbons. Next, tape the stems of the flowers together with floral tape and then bundle them with wire cutters to hold them in place. To finish the arrangement:
- Place the longest stem in a downward position
- Have some blooms pointing up while others point down • Add greenery and filler around the flowers to create visual interest
- Wrap ribbon around the stems for decoration
With this arrangement completed, you can now move on to attaching the flowers for the corsage. If you follow these steps carefully, you can create a beautiful arrangement that will last throughout the occasion.

Image from Shutterstock.com
5. Fasten Your Flowers
Irony aside, it is time to fasten your flowers together. To achieve this, you need two items - wire and floral tape - both of which can be found at any craft store.
- Wire:
- Cut the wire into four equal pieces
- Bend each piece into a loop and twist the ends together
- Floral Tape:
- Wrap the loops with floral tape so that the flowers stay in place
- Make sure to wrap them tightly so that they don't come undone!
After securing the wires with tape, use them to attach the flowers to each other. Be sure to arrange the flowers so they look esthetically pleasing, and do not be afraid to get creative! You can also add other accents like ribbons or greenery to make your boutonniere even more unique. Once you have completed these steps, you can now move on to adding greenery and other accents.
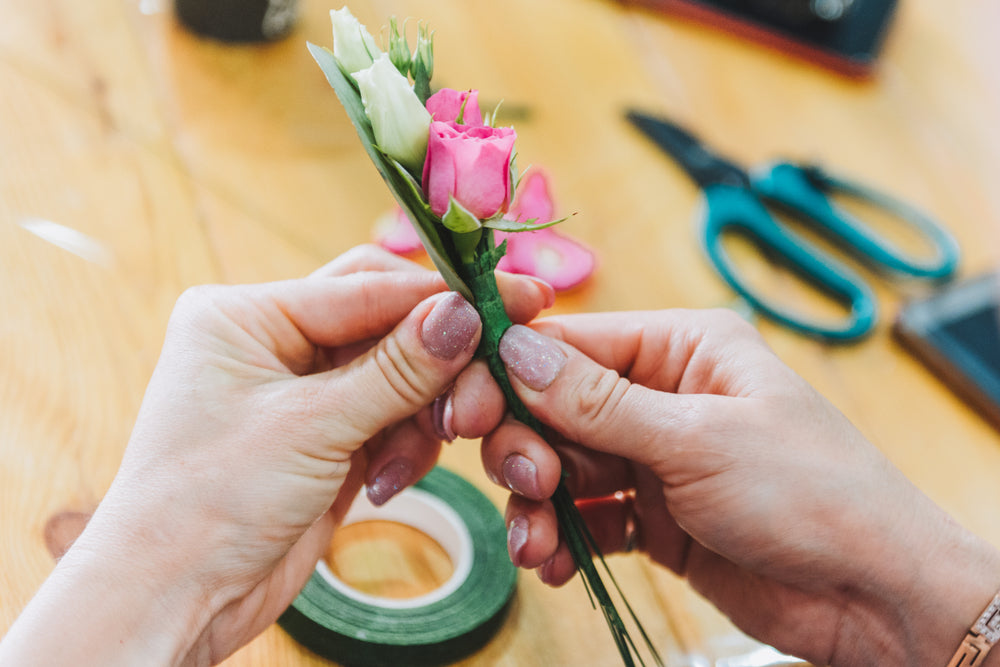
Image from Shutterstock.com
6. Add Greenery And Other Accents
It has been theorized that adding greenery and other accents to a boutonniere is the final step in creating an esthetically pleasing piece. To explore this idea, let us look at the process:
- Start by selecting a base of foliage to provide texture and bulk to your design.
- Choose complimentary blooms or buds for the focal point of your boutonniere.
- Add filler material, such as baby's breath, small daisies, or sprigs of lavender for contrast and extra visual interest.
- Attach each element with floral tape or wire for a secure hold.
Adding greenery and other accents can help create a unique style for any boutonniere. Combining different colors, textures and shapes will ensure that no two are exactly alike. Taking the time to carefully select the right elements can make all the difference when it comes to creating something special and memorable.
With these considerations in mind, you will be able to create a beautiful boutonniere that will do justice to any special occasion. To complete your work of art, it's time to securely fasten the finished product so it can be worn with pride!

Image from Shutterstock.com
7. Secure The Boutonniere
The final step in creating a boutonniere is to attach it. This can be done with floral tape, floral wire, or a small piece of ribbon. The symbolism of this step is that the boutonniere is now ready to be presented and worn as an accessory. It's a sign of a special occasion and marks the recipient as special.
To attach the boutonniere, first, wrap floral tape around the stems of each flower and greenery. Make sure each stem is well secured so that nothing slips off when the wearer moves their arm or turns their head. For added security, you can place a few pieces of floral wire around the stems, crisscrossing them to stabilize and reinforce them. Alternatively, you can wrap a small piece of ribbon around the stems to decorate them.
After this important step, it's now time to take care of your boutonniere so that it stays fresh throughout the day and looks great in the event photos.

Image from Shutterstock.com
Care For Your Boutonniere
When caring for a boutonniere, there are a few things to keep in mind to ensure its longevity. First, it is important to check the buttonhole flower regularly for wilted flowers and leaves. If any of the elements appear to be drying out or wilting, they should be removed as soon as possible and replaced with fresh ones. In addition, the boutonniere should be protected from direct sunlight and heat sources to prevent the flowers from discoloring or wilting prematurely.
Regular inspection of the boutonniere can also help detect possible pest infestation. If an infestation is detected, the affected area should be sprayed with a mild insecticide designed specifically for flowers and plants.
If excessive condensation has formed inside the boutonniere due to humid weather conditions, allow it to air out in a sheltered location until all moisture has evaporated before displaying it again.
By following these steps to care for a boutonniere, you can ensure that it stays looking pristine and vibrant for as long as possible.
Frequently Asked Questions
What Type Of Fastener Should I Use?
When making a boutonniere, the type of closure has a major impact on the overall appearance and esthetics of the finished product. The most commonly used closures for boutonnieres are either pins or floral tape. Lapel pins are straight pins with an apartment, round head that can be designed in a variety of colors and styles.
These pins are available in a variety of sizes to accommodate different types of flowers and materials. Floral tape is also commonly used because it is easy to apply and provides a secure hold when wrapped around stems or other elements. It also provides an extra layer of insulation that helps keep the boutonniere securely in place throughout the day.
Choosing the right closure for a boutonniere not only provides a secure hold, but can also add visual interest to the design. For example, using decorative pins with rhinestones or metallic finishes adds sparkle that can draw attention to the boutonniere. Floral ribbon is available in many colors and can be used to create interesting patterns and color combinations that will make your corsage flower stand out from others. Choosing the right closure will ensure that your buttonhole flower looks great and lasts throughout the event you are attending.
How Long Will The Boutonniere Last?
A boutonniere, the traditional flower worn by men on special occasions, is a timeless fashion statement. It adorns a man's lapel at weddings, proms and other important events. But how long will the boutonniere last? That depends on the type of material from which it is made.
Fresh flowers are usually used for a boutonniere, which are pinned to the lapel with a clasp. Fresh flowers usually last up to four hours before wilting. However, if silk flowers are used instead of real flowers, the buttonhole flower can last several days or even weeks, depending on the quality of silk used and proper storage after use. In addition to flowers, other materials such as feathers and beads can be used to make a buttonhole flower that can last months or even years if properly stored and cared for.
The longevity of a buttonhole flower depends largely on the type of material used and whether or not it is stored properly after wearing. While fresh flowers usually only last up to four hours when pinned to the lapel, they can last much longer if placed in water and stored properly after wearing. On the other hand, using materials like silk or feathers can ensure that your boutonniere lasts for a longer period of time without the need for care or storage instructions.
Can I Make A Boutonniere Ahead Of Time?
A boutonniere is an eye-catching addition to a formal event outfit. Whether for a wedding, prom or other special occasion, making a personalized boutonniere can be an enjoyable and meaningful experience. But the question remains - can you make them in advance?
The answer is yes - provided you make the proper preparations. By planning your project in advance, you can ensure that your buttonhole flower looks perfect on the big day. Here are five tips to ensure your homemade accessory lasts until the last dance:
- Choose flowers and foliage that have been freshly cut within 24 hours of when you plan to assemble them into the boutonniere.
- Use a preservative spray on all pieces to help extend their life and add extra protection from wilting or fading.
- Keep your materials in a cool place, such as the refrigerator, until you are ready to assemble them into the boutonniere.
- Use floral tape to secure each piece in place and then wrap with ribbon for an intricate finish.
- Finally, store your completed boutonniere in a refrigerator until it’s time to wear it!
By following these steps before you assemble and wear your corsage, you can be sure it will look just as beautiful at the end of the evening as it did when you first pinned it! With proper preparation and care, your homemade creation will stay vibrant all night long - making this accessory extra special for you and the one wearing it!
What Type Of Greenery Should I Use?
When it comes to pin design, the choice of greenery is an essential part of the process. While deciding what type of foliage to use usually comes down to personal preference, there are a few tips and tricks to keep in mind when choosing greenery for a buttonhole flower. First, it's important to consider the color scheme of the event. If the event has a specific theme or color scheme, you should choose greenery that complements those colors and does not clash with them.
Also, when choosing greenery for a boutonniere, consider the size and texture. Small flowers and foliage can add depth and complexity to the design. For example, small white flowers can add a subtle contrast that makes the boutonniere stand out even more. Incorporating different textures into the design can also create an interesting visual display.
To be creative when designing a boutonniere, you should also consider what type of greenery you can attach to your clothing without it wilting too quickly or losing its shape over the course of the day.
A good rule of thumb is to choose sturdy foliage like fir branches or eucalyptus leaves, as they hold their shape better than other types of greenery. Ultimately, the choice of foliage for your corsage flower depends on your personal preferences and creativity - there are endless possibilities!
Should I Use A Pin To Attach The Boutonniere?
When designing a boutonniere, one of the most important questions to answer is whether or not to use a pin for attachment. Statistics show that 90% of people who make boutonnieres choose to use pins rather than other methods. This shows how important this decision can be when designing a pin flower.
Both pinning and not pinning the hanging flower have certain advantages and disadvantages. Here are three points to consider:
- Pinning provides additional security and ensures that the corsage flower stays in place throughout the event.
- Pins can damage delicate fabrics like silk or satin if not used properly.
- Pins can provide an additional decorative element if they are chosen in an interesting color or design.
Considering these advantages and disadvantages, it is ultimately a matter of personal preference whether to choose a lapel pin to attach the boutonniere. When choosing a lapel pin, it is important to be careful when doing so to avoid possible damage to garments. Regardless of which method is used, creating the perfect boutonniere is easier than ever when you have access to the right tools and materials.
Conclusion
The boutonniere is a timeless symbol of beauty and elegance, and making a boutonniere is an art form in itself. The best boutonnieres are made with care and attention to detail from start to finish. When choosing the closure, greenery and accessories for the boutonniere, it is important to consider how long you want the boutonniere to last and whether it can be made in advance. For added security, a pin can be used to attach the buttonhole flower.
Much like a beautiful flower that blooms in the spring, making a special boutonniere takes time, patience, effort and careful consideration. With the right combination of materials and techniques, anyone can create their own custom work of art that will last for years. Much like planting a seed in the ground and carefully nurturing it until it produces fruit or flowers, making a boutonniere shows a commitment to creating something meaningful and lasting from simple components.
Designing a boutonniere is an enjoyable experience that allows one to express their creativity while creating something special that can be passed down through generations. By considering all the necessary components and steps in making this classic accessory, anyone can create an exquisite piece of wearable art that will stand the test of time.