
Image from Canva
The paracord bracelet has become a popular fashion accessory for modern people. It not only adds style to any outfit, but can also be used for practical purposes.
If you know how to make a paracord bracelet, you can not only express your personality, but it can also be very useful in an emergency situation. In this article, you will find step-by-step instructions on how to make your own stylish yet functional paracord bracelet.
Making a paracord bracelet is surprisingly easy and requires only a few basic materials. All you need are two clasps, some string, and a lighter or scissors. Once you have these things together, you can start making your unique piece of jewelry. With just an hour or so of effort and creative thinking, you'll have made yourself an eye-catching accessory that may save your life one day!
Crafting your own paracord bracelet is an exciting way to express your individuality and show off your creativity. It's also incredibly satisfying to know that you are wearing something that could help you in an emergency situation when you need it. So what are you waiting for? Get started and learn how to make this useful and stylish piece of jewelry!
1. Gather Your Materials
2. Choose The Type Of Paracord Bracelet
1. Cobra Weave
2. Fishtail Weave
3. Boa Weave
3. Learn The Basic Paracord Bracelet Knots
4. Measure And Cut The Paracord
5. Attach The Buckle To The Paracord
6. Begin Making The Bracelet
7. Make The Core Of The Bracelet
8. Add Decorative Elements To The Bracelet
9. Finishing The Bracelet
Tips For A Professional Looking Bracelet
Care And Maintenance Of Your Paracord Bracelet
Frequently Asked Questions
What Safety Precautions Should I Take When Making A Paracord Bracelet?
How Do I Know How Much Paracord I Will Need To Make The Bracelet?
Is It Possible To Make A Paracord Bracelet Without Using A Buckle?
What Is The Most Basic Type Of Paracord Bracelet I Can Make?
What Is The Best Way To Store A Paracord Bracelet When Not In Use?
Conclusion
1. Gather Your Materials
The beginning of a project is always the most difficult part. The saying 'A journey of a thousand miles begins with a single step' comes to mind when it comes to making a paracord bracelet. The first step is gathering all the materials.
This means deciding what type of paracord you want to use for your bracelet (more on that later). You'll also need scissors, a tape measure, and a lighter or matches.
Depending on the complexity of your bracelet, you may need other items like buckles, clips, and needles for lacing. Once you have all the necessary utensils together, you are ready for the next step in making your masterpiece.
Once you have all the materials together, it's time to choose the type of paracord that best suits your needs...

2. Choose The Type Of Paracord Bracelet
The type of paracord bracelet you choose will determine the look and feel of the final product. Therefore, it's something to think about before proceeding. Just like putting together a puzzle, choosing the right pieces is critical to achieving the desired result!
To make sure you get exactly what you want, here are 3 types of paracord bracelets to choose from:
1. Cobra Weave
This classic and traditional style is for those looking for an easy-to-make, but very attractive bracelet.
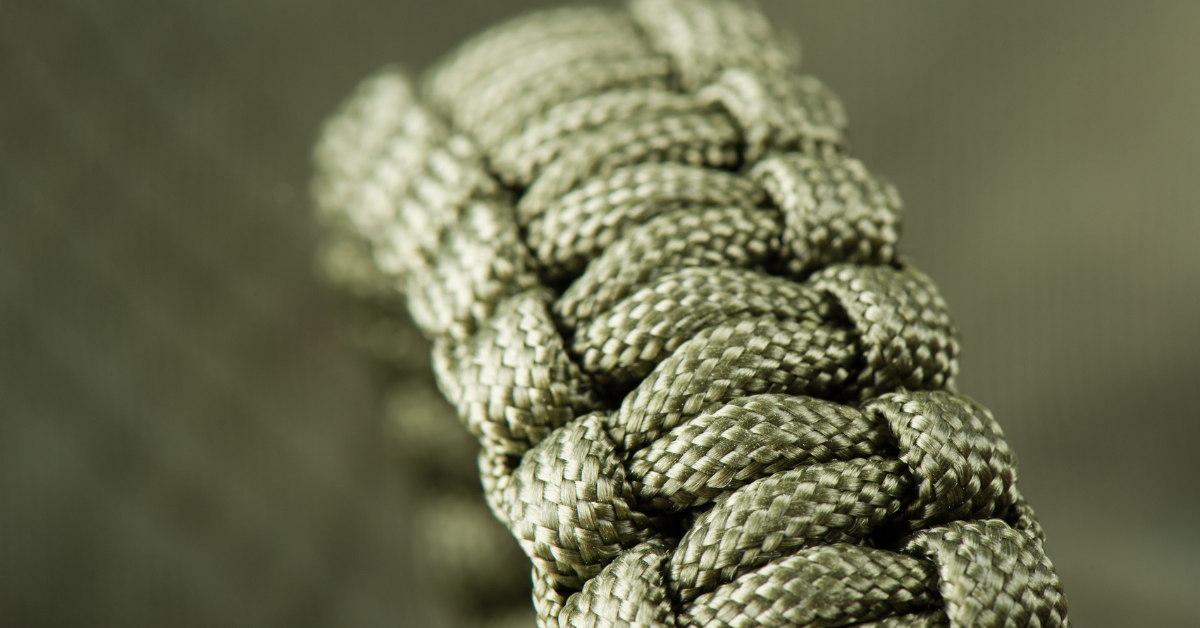
Image from Canva
2. Fishtail Weave
This is a great option if you want something with more complexity in terms of pattern and design.

Image from Canva
3. Boa Weave
If you want to add a little more flair to your project, the Boa Weave is perfect for adding beads or charms to your design.
No matter what type of paracord bracelet you choose, there are endless ways to create something unique and eye-catching! With careful planning and dedication, any style can become a reality - just like a butterfly hatching from its cocoon! Now that you've decided on a paracord bracelet, it's time to learn how to make it using basic knots.

Image from Canva
3. Learn The Basic Paracord Bracelet Knots
Learning the basic knots for a paracord bracelet is like learning a dance routine - it may seem complicated at first, but once you get the hang of it, you can start improvising and create something unique. With that in mind, let us get into the three basic knots for making a paracord bracelet: the lanyard knot, the cobra stitch, and the king cobra stitch.
The lanyard knot is probably the simplest of all the knots used to make a paracord bracelet. It simply consists of two loops that are wrapped around the finger and intertwined. To tie this knot, thread one end of the cord through one loop and then back through the other loop. Pull tight and repeat the process on both sides until you reach the desired length.
Next comes the cobra stitch, which is a little more complicated than the lanyard knot. This involves wrapping one end of the cord around itself twice before passing it through an existing cord loop and pulling it tight so that there is equal tension on both sides. For a more complicated look, you can try joining multiple strands together using the same technique over and over again until you reach the desired length or width.
Finally, there is the King Cobra Stitch, which takes all of these techniques one step further by adding more layers to create an even thicker look for your paracord bracelet. This involves making two loops with each side of the cord, then intertwining them like a lanyard knot before repeating the process several times until you're happy with the result.
Now that we have discussed some of these paracord bracelet knots for beginners, it's time to measure and cut our cords to the desired size.
4. Measure And Cut The Paracord
Making a beautiful paracord bracelet can be daunting for a beginner. But with the right tools and instructions, it can become an enjoyable experience. The next step on the path to your own masterpiece is measuring and cutting the paracord.
Again, preparation is the key to success. Before measuring, gather the materials you need: paracord, scissors or knife, lighter and tape measure. Then, first measure your wrist to determine the size of the bracelet you want to make. This way you can calculate the amount of cord you need and determine the length of the cord.
Now, using scissors or a knife, carefully cut two pieces of paracord. Make sure that each piece is the same length - this will ensure that both sides of the bracelet end up the same length. Once both pieces are cut, seal the frayed ends on each side with a lighter for safety and esthetic reasons. Now you're ready to attach the buckle to your newly cut cord pieces!
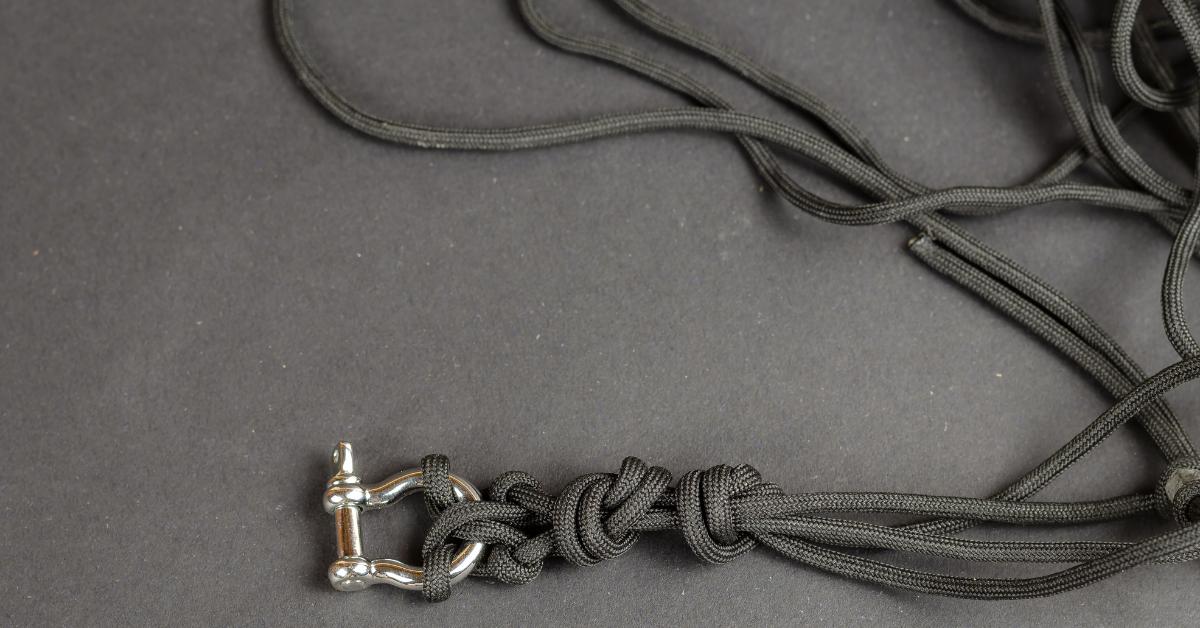
Image from Canva
5. Attach The Buckle To The Paracord
Attaching the buckle to the paracord is like a puzzle where all the pieces have to fit together perfectly. It requires patience and an eye for detail, but with practice and a few steps, it's done in no time. To get started, you'll need two pieces of paracord of equal length and the buckle of your choice.
Take one piece of paracord and slip it through the first loop of the buckle. Make sure it's secure and repeat the process with the other piece of paracord through the second loop. Once both cords are securely attached to the buckle, start tying square knots around each piece of paracord until you have a bracelet that fits comfortably on your wrist. Make sure you tie enough knots so the bracelet isn't too loose.
After you check that everything is secure and tight, you can start making the bracelet. If you know how to attach the clasp, you now have all the tools you need to succeed!
6. Begin Making The Bracelet
Now that you have attached the buckle to the paracord, you can start making the bracelet. The process is surprisingly simple and straightforward, so you can easily make it even if you are doing it for the very first time. All you need for this project is a little time and patience.
Start by taking one side of the paracord and placing it over the top of the buckle. Pull it under and through both loops on either side of the buckle. Make sure the cord is tight so it does not slip. Once you have done this with both sides of the paracord, you can start braiding the bracelet together. Take one end of each strand and weave them together in an over-under pattern as you pull them away from each other. Keep doing this until you reach the desired length of your bracelet.
Now that you have woven your bracelet together, you are almost done! You just need to make sure everything looks neat and secure before moving on to the next step: making the core of your bracelet.
7. Make The Core Of The Bracelet
Are you ready to complete your paracord bracelet? Then let us get started! Now that you have all the necessary materials and have completed the previous steps, it's time to make the core of the bracelet. Parables can be a great way to engage readers, so let us use one here: Weaving a paracord bracelet is like driving a car. Both require attention and concentration to achieve optimal results.
The first step in making the core of the bracelet is to take two strands of cord, align them parallel to each other, and tie an overhand knot at one end. Then you need to divide each strand into four parts and make a loop for each strand on one side of the knot. Make sure that both loops are facing inward. Next, take alternating strands from each side of the loop and cross them over each other before returning them to the corresponding loops opposite where they were taken out. This process is called "weaving' and must be repeated until you reach the desired length or circumference.
Now check if the weave is tight enough - if not, press down with your fingers on both sides to make sure everything is tight.
When you are satisfied with the result, tie another overhand knot at one end and trim the protruding cord ends with scissors or nail clippers. Congratulations - you have now successfully made the core of your paracord bracelet! Now you just need to add decorative elements before you can proudly wear it.

8. Add Decorative Elements To The Bracelet
Making a paracord bracelet is like starting a journey. You plan the steps, gather the materials, and approach each step carefully and mindfully. Once you've put in the effort to make the core of the bracelet, it's time to add decorative elements.
This is an important part of the process; you need to decide what you want your bracelet to look like when it's finished. You may want to add colored cords for contrast, or use beads to remind you of something important. Whatever you decide, adding decorative elements will give your paracord bracelet its own personal style - it's like giving your journey a personality.
Once you've decided on the look of your bracelet, it's time to finish it and save your work. The final steps are all about tying knots and weaving cords to keep everything in place. With a little patience and skill, you'll soon have a beautiful piece of jewelry that represents your journey and all its unique details!
9. Finishing The Bracelet
Once you have finished knotting, weaving, and adding decorative elements to your paracord bracelet, it's time to finish the project. You have probably come a long way: from a pile of cord to an intricately designed piece of jewelry. This final step will help you tie everything together with a neat bow.
The goal of this step is to make sure all the ends are neatly tucked away so your bracelet looks professional. To do this, first cut off the excess length at the ends of the cords and fuse them together with a lighter or match. This will keep them secure and prevent them from fraying. Next, use tape or liquid glue to cover up any exposed knots and seams in your design. This will give your bracelet a polished look that is sure to catch everyone's eye when you wear it!
With these final touches, your paracord bracelet is now ready to make its debut! With a little patience and attention to detail, you can create an eye-catching accessory that will be admired by all who see it. Now that you have crossed the finish line and created something beautiful, why not take it one step further? In just a few steps, you can add extra flair and personality to your bracelet to make it look even more professional.
Tips For A Professional Looking Bracelet
If you thought that making a paracord bracelet was an almost impossible task, then achieving a professional and polished look for your bracelet will seem like a Herculean task! But don't worry, with a few simple tips you can easily make your paracord bracelet look its best.
The most important thing when it comes to adding a professional touch to your final product is to check it carefully and make sure all the knots are secure. Make sure they don't come loose easily and that everything looks neat and tidy. It's also helpful to put some sort of sealant or adhesive on the knots to keep them in place while you're wearing them. Also, make sure the ends have been properly seared or fused so there are no loose strands sticking out.
Once you've checked all the knots and completed all the details, take a moment to admire your work! You've put in a lot of hard work and dedication, and you should be proud of yourself for creating such an intricate work of art. Now that you've completed your paracord bracelet, it's time to learn about the care and maintenance of your masterpiece...
Care And Maintenance Of Your Paracord Bracelet
Once you have completed the construction of your paracord bracelet, it is important to learn about proper care and maintenance to keep your bracelet looking professional. To ensure the longevity of your bracelet and its design elements, there are a few steps you should follow.
First and foremost, you should avoid exposing your bracelet to water. Water can affect the strength of paracord strands and, in some cases, cause discoloration. If you must get your bracelet wet, you should dry it with a soft cloth as soon as possible after removing it from the water. Direct sunlight can also cause discoloration. Therefore, avoid exposing your bracelet to direct sunlight for extended periods of time.
To keep your paracord in the best condition, regular cleaning is recommended. A mild detergent or soap solution can be used on a damp cloth to gently remove dirt and oils from the fibers. Be careful not to scrub too hard, as this could damage or fray the cords. After cleaning, allow the bracelet to air dry completely before wearing it again.
Regular inspections are also necessary to maintain the professional appearance of your paracord bracelet. Look for signs of fraying or weak spots on either side of the fabric, as well as knots that may have come loose during wear. Make sure all components are securely connected and adjust as needed. With proper care and maintenance, you will have a beautiful paracord bracelet that will last for years!
Frequently Asked Questions
What Safety Precautions Should I Take When Making A Paracord Bracelet?
Better safe than sorry - this saying is especially true when it comes to making a paracord bracelet. Before you get to work, take some safety precautions to ensure the process goes smoothly.
First, wear protective clothing such as gloves and eye protection. Paracord can be sharp and even cause cuts if not handled properly. It's also important to use tools that are specifically designed for crafting with paracord. These tools have safety features that make working with paracord easier and safer.
Second, make sure your work area is clear and free of clutter. A cluttered work area can lead to accidents or delays in completing your project. Also, if you are using a heat sealer, make sure it is on a clean surface and away from flammable objects or materials such as paper or clothing. It's also important to watch out for children and pets while you are working on your bracelet, as they may be tempted to examine the materials or tools used during the process.
By taking these safety precautions, you can be sure that making your paracord bracelet will be a successful and enjoyable experience!
How Do I Know How Much Paracord I Will Need To Make The Bracelet?
A paracord bracelet is an iconic symbol of strength, courage and resilience. No wonder they're so popular! But to make the perfect bracelet, you need to know how much paracord you need. It can't be too loose or too tight.
How much paracord you need depends on the size of your wrist. To make sure your bracelet fits comfortably, measure your wrist before you begin. When measuring, leave a few extra inches for the knotting process and consider whether you want the final product to be more snug or loose. A good rule of thumb is to add about a yard of cord for every inch of circumference on your wrist. If you want to make a thicker bracelet with multiple strands of cord, you'll also need to take that into account with the amount of cord you use.
Once you have an idea of how much paracord you need for your project, it's important to double check everything before you get started. That way, there won't be any surprises when you weave the bracelet together! By carefully measuring and double checking your measurements before you start the project, you can make sure your bracelet is the perfect size and will look great when it's finished!
Is It Possible To Make A Paracord Bracelet Without Using A Buckle?
The art of weaving a paracord bracelet is like a dance. The paracord and the buckle move in an intertwined pattern as if they were partners on the dance floor. It's a mesmerizing sight that has been used for centuries to create beautiful jewelry.
But what happens when you do not have the right materials? Is it possible to weave a paracord bracelet without using a buckle?
Yes, it is possible! This method requires more skill and patience than the traditional buckle, but with practice, anyone can master this technique. Here are some tips on how to make a paracord bracelet without a buckle:
Use the cobra stitch: This involves using two or more pieces of paracord that interlock in an alternating pattern. If you need help mastering this technique, there are plenty of tutorials online that will guide you through each step.
Use the fishtail braid: This technique requires only one piece of paracord and uses simple braiding techniques to form the bracelet shape. Once again, there are many tutorials available online if you need additional guidance.
Other methods: There are other ways to create your own paracord bracelet without using buckles such as macrame knots and fusing beads onto the cord. Experimenting with different techniques can be fun and rewarding!
Making your own paracord bracelet without buckles may seem daunting at first, but with practice you'll soon be making beautiful bracelets with ease! Thanks to the many tutorials available online, anyone can learn these techniques quickly and easily- all it takes is a little time and dedication!
What Is The Most Basic Type Of Paracord Bracelet I Can Make?
Paracord bracelets have been a symbol of strength and courage since World War II II, when they were first worn by soldiers. They continue to be an inspiring reminder of the bravery and determination people can show in difficult times. Making a paracord bracelet is a unique way to pay tribute to this historic tradition.
The simplest type of paracord bracelet you can make is called a cobra braid. This braid requires only one strand of paracord and no additional materials such as buckles or clips are needed. It's a great option for those who are just getting started with paracord crafting or do not have access to additional supplies. To make the Cobra braid:
- Create two loops from the paracord and cross them over each other.
- Take the left loop over the right loop while holding both loops in place with your thumb and index finger.
- Pull the end of the right loop through both loops, then pull it tight until it forms a knot around both loops.
- Continue weaving by repeating steps one through three until you reach your desired length, then secure it with a simple knot at the end.
Making a Cobra Weave bracelet is an easy introduction to paracord crafting, whether you want to make something special for yourself or as a gift for someone else. With practice, you can make more complicated designs with different colors and patterns - just remember that even this simple design can look beautiful if done carefully!
What Is The Best Way To Store A Paracord Bracelet When Not In Use?
Paracord bracelets are a popular way to add a stylish touch to any wardrobe. Not only are they fashionable, but they're also a functional piece of jewelry that comes in handy in times of need. Therefore, it's important that you store your paracord bracelet well when it's not in use.
It's best to store paracord bracelets in their original packaging or in individual protective containers. It's important to protect the bracelet from moisture and extreme temperatures, as these can damage the bracelet and cause it to break over time. Also, avoid storing the bracelet with other items that could pinch or stretch the cord, causing it to become brittle or break.
To prolong the life of your paracord bracelet, clean it regularly with warm water and mild soap before putting it away. This will remove dirt and debris that could damage the cord over time. After you've cleaned and dried your bracelet, store it in a place where dust and moisture won't be a factor. With proper storage methods, your paracord bracelet will stay beautiful for years!
Conclusion
Paracord bracelets are a great way to add style and flair to any outfit. They are also incredibly easy to make with just a few basic tools and materials. Making paracord bracelets can be a fun activity for people of all ages and skill levels, from beginners to experienced DIYers. With the proper safety precautions, anyone can make their own unique and stylish bracelet in no time.
When making a paracord bracelet, it is important to measure carefully and have enough material on hand before beginning the project. Also, there are several creative ways to make a paracord bracelet without a buckle or other hardware. The simplest type of paracord bracelet is the cobra braid, which is easy to master with a little practice. When you are not using your paracord bracelets, store them in an airtight container that is free of moisture to keep them looking good for years to come.
In summary, making your own paracord bracelet is a fun activity that produces amazing results. With some careful planning and preparation, anyone can make their own unique piece of jewelry that will last through countless adventures!