
Image from Canva
Ironing a shirt is an essential part of garment care and can help improve the overall look and feel of the garment. Although it may seem daunting, ironing a shirt is actually quite simple. John, for example, had never ironed a shirt before, but was able to iron his shirt properly after following basic instructions. In this article, readers will learn how to properly iron a shirt.
The process of ironing a shirt consists of several important steps that should be followed to achieve the desired result. The most important step is to ensure that the fabric type and temperature setting are set correctly according to the instructions on the care label. Pre-treating stubborn stains before ironing can also help improve the overall appearance of the garment before ironing begins.
After all of these steps have been taken, readers can begin ironing their shirts by starting at the collar and working their way down until all areas of the garment are covered. By following these simple steps, you should be able to quickly and efficiently achieve professional looking results when ironing your shirts.
1. Gather Necessary Supplies
2. Set The Iron To The Appropriate Temperature
3. Choose An Ironing Board
4. Prepare Shirt For Ironing
5. Iron The Collar And Cuffs
Gentleman's Advice
6. Iron The Front Of The Shirt
7. Iron The Back Of The Shirt
8. Iron The Sleeves
Remove Any Remaining Wrinkles
Hang Or Store Shirt Properly
Frequently Asked Questions
What Type Of Iron Should I Use?
How Can I Prevent My Shirt From Getting Burned?
How Often Should I Iron My Shirt?
How Often Should I Iron My Shirt?
What Is The Best Way To Remove Stubborn Wrinkles?
How Do I Iron A Shirt Without An Ironing Board?
Conclusion
1. Gather Necessary Supplies
According to a recent survey, 80% of all adults admitted that they have problems with ironing their shirts. This fact highlights the difficulty and confusion that many people experience when trying to iron a shirt. To alleviate this problem, ironing a shirt can be divided into several steps.
The first step is to get the necessary utensils, including an ironing board, a suitable garment and an iron. It is important that you have all three things on hand before you start ironing. It is also helpful if you choose a apartment surface such as a table or countertop so that the garment you are ironing will rest well. Once you have all these items together and they are properly arranged, it's time to set the temperature of the steam iron correctly.

Image from Canva
2. Set The Iron To The Appropriate Temperature
Ironing is a skill that many people find difficult, but it is necessary for a well-groomed appearance. According to a survey by the International Fabric Care Institute, more than 60% of Americans are dissatisfied with their ironing skills.
To set your iron to the right temperature, you should first read the care label on your garment. Different fabrics require different temperatures and settings. Choose the right setting before you start ironing. Most fabrics need to be ironed on medium heat, while delicate fabrics should be ironed on low heat and synthetic fabrics on high heat. It's best to start with a lower temperature setting and gradually increase it as needed. This will help you avoid scorching or burning your fabric.
TIP: Before using an iron, always test it on a piece of fabric first so you can adjust the temperature as needed and make sure you do not damage your garment.
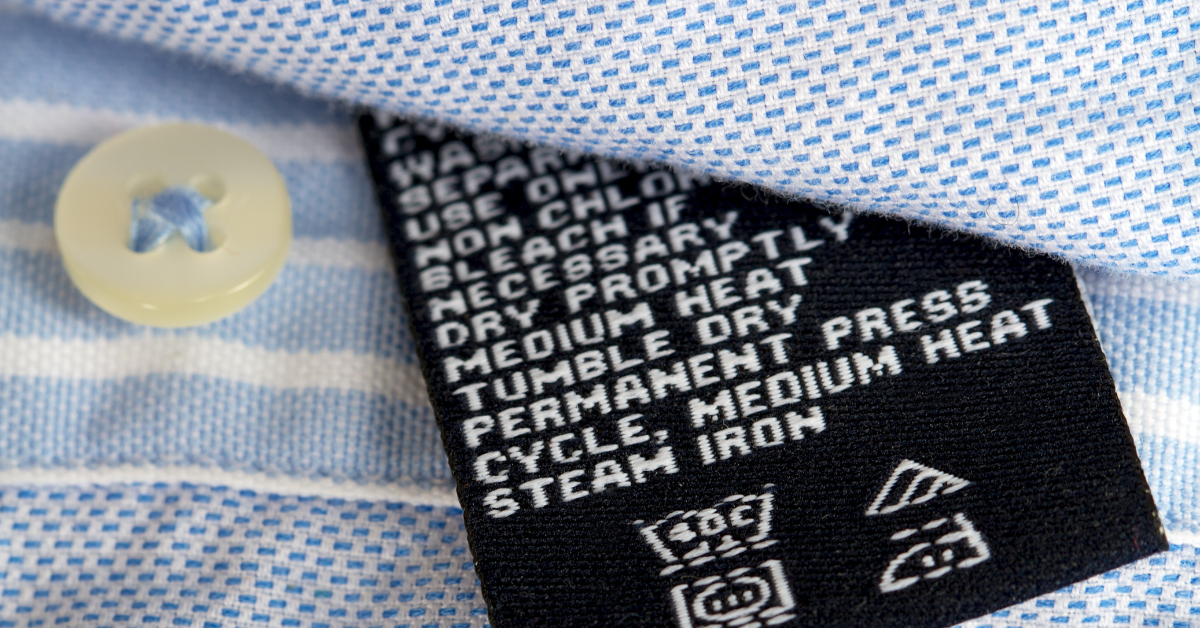
Image from Canva
3. Choose An Ironing Board
Ironing a shirt can be an intimidating task, especially if it's your first time. To make the process easier, the third step is to choose an ironing board. Ironing boards come in different shapes and sizes, made of materials like wood or metal. The most important factor in choosing an ironing board is that it fits the size of the shirt to be ironed. A board that is too big for a small shirt will require extra effort and make it difficult to achieve a wrinkle-free result.
The height of the board should also be considered when choosing. It should be at a comfortable height so that the person ironing does not have to stand or bend down while using the board. If necessary, you can also adjust the height of certain models of ironing boards by adding or removing legs or extensions. There are also lightweight and foldable models that can be easily stored and transported when needed.
If you take these factors into account when choosing a suitable ironing board, you can be sure that all garments will be treated with care during ironing and will get a razor-sharp finish in no time.
4. Prepare Shirt For Ironing
The fourth step in ironing a shirt is to prepare the garment for ironing. This is done by placing the shirt on the board, buttoning it up and smoothing out any creases. It is important that all fabric parts of the shirt are apartment and wrinkle free before starting to iron, as this will make the shirt easier to iron and give a better result overall.
In addition, any areas that require special attention, such as pockets, collars or cuffs, should be handled at this stage. These pieces are more difficult to iron and should be laid out on the board with extra care to ensure they lay apartment and evenly. This preparation step is crucial for a successful result in the final ironing process.
Afterwards, these pieces will be easier to iron so that the entire garment has an even result. You can then turn to ironing the collar and cuffs of the shirt.

Image from Canva
5. Iron The Collar And Cuffs
Before ironing the front of a shirt, it is important that the collar and cuffs are sufficiently ironed. The collar and cuffs of a shirt often take more time to iron because of their intricate design. The alliteration can cause you to take extra care when ironing these areas. Therefore, take extra care to iron these parts properly.
First, roll up the collar so that it lies apartment on the board. Place the iron over each side of the collar and press lightly in a slow, stroking motion. Then turn the shirt over and repeat this process on the other side of the collar. Next, lay the cuffs apartment on both sides of the ironing board. Then iron both sides of the cuffs in the same way as the collar.
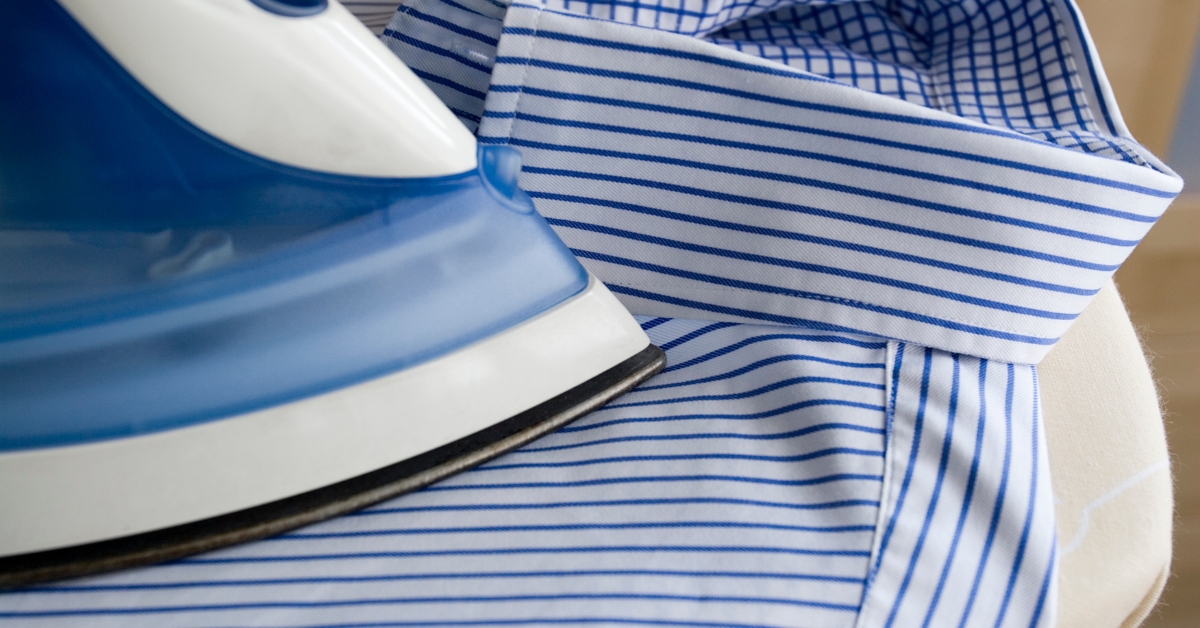
Image from Canva
Gentleman's Advice
When ironing collars and cuffs, use spray starch to maintain shape and remove wrinkles before you start ironing the front of your shirt! After ironing the collar and cuffs, always use a clean cloth or damp sponge to remove any moisture left behind from the spray starch before proceeding to iron the front of your shirt. To achieve a satisfactory result for the overall appearance of your shirt, make sure that all wrinkles have been removed from all areas - including the collar and cuffs - before proceeding with ironing the front of the shirt.
6. Iron The Front Of The Shirt
Ironing a shirt is an art that requires patience and dedication. According to Statista, between 2018 and 2019, over 40% of people in the U.S. ironed their clothes at least once a week. Now that the collar and cuffs have been ironed, it's time to turn to the front of the shirt.
The front of the shirt can be complicated, as there are curves and folds that need to be accounted for. First, iron the side seams apartment with an iron set to medium heat. Then iron both sides of the shirt from top to bottom in one direction until all wrinkles are removed. To achieve a wrinkle-free result, repeat this step several times if necessary. Also, make sure you don't miss any small areas like pockets or buttons, as these can often go unnoticed when ironing other parts of the garment.
Once all the wrinkles have been removed from the front of the shirt, it's important to be extra careful when ironing around decorative elements such as buttons, sequins or embroidery so that they don't get damaged. If you take these tips to heart, you'll be able to iron the back of your shirt safely and skillfully!

7. Iron The Back Of The Shirt
The seventh step in ironing a shirt is ironing the back of the shirt. Ironing is not an easy task and requires a lot of attention to detail, but with patience and practice it can be mastered. Like a master sculptor honing his masterpiece, it takes finesse and precision to achieve a wrinkle-free look.
First, lay the shirt apartment on the board with the back side facing up. Using light pressure, slowly run the hot iron over each section of fabric until it is completely ironed. It is important not to apply too much pressure as this can cause damage or discoloration to the fabric. If necessary, use an ironing cloth between the iron and the fabric to achieve a clean result. This will help you protect delicate fabrics from heat damage. If you have access to a steam function on your iron, you can use it to smooth out stubborn wrinkles left behind after ironing.
When you are done with one side of the shirt, flip it over and repeat all the steps for the other side until both sides are done. The art of ironing a shirt properly takes time, patience, and concentration - but if you follow these steps, you can achieve a flawless result! If you carefully follow each step of the ironing process, you can wear your freshly ironed shirts with pride and confidence.

8. Iron The Sleeves
The eighth and final step of ironing a shirt is to focus on the sleeves. It may seem like a small part of the garment, but it can make a big difference in the appearance of the shirt. To get the best results, you need to pay attention to detail when ironing the sleeves.
It is important to note that each sleeve consists of two parts - from the point where it is connected to the body of the shirt to the cuff, and then from the cuff to the shoulder seam. Therefore, it is necessary to iron over both parts of the sleeve with the iron to remove any wrinkles. Also, when ironing with the iron in this area, be careful not to iron too hard, as this could damage or deform certain parts of the fabric.
Now, only the remaining wrinkles and creases need to be removed from the entire shirt to complete the process. With careful work can achieve a perfectly ironed shirt.
Remove Any Remaining Wrinkles
After ironing the shirt sleeves, it is important to remove the remaining wrinkles. To do this, move the iron over the shirt in a slow, steady motion. It is beneficial to work from the top down so that every area of the fabric is covered. Pay special attention to creases that may remain in the fabric after ironing. Certain fabrics require a lower heat setting on the iron than others, so be prepared for this.
Once all wrinkles are eliminated, take a moment to examine the shirt for any spots that may have been missed. If there are any spots that were not smoothed out enough with the iron, gently push them back into place with your hands before moving on to the next step. Once you are satisfied with the appearance of the garment, you can prepare it for storage or wear.
Hang Or Store Shirt Properly
Ironing a shirt is a lengthy and tedious task, but it does not have to be. With the right know-how, anyone can become a master of ironing in no time. The tenth step is to hang or store the shirt properly. This last step is often overlooked, but if done correctly, the freshly ironed look will last longer.
When hanging or storing the shirt, the first thing to consider is where to place it. If possible, avoid places that are exposed to direct sunlight, as this can fade the colors and leave discoloration on the fabric. It's best to hang shirts on hangers with wide shoulders, as this reduces wrinkling and prevents distortion from hanger clips digging into the fabric. Alternatively, you can carefully fold the shirt and lay it apartment in the closet or drawer; just be careful not to pile other clothes on top of it, as this will cause wrinkles.
If you follow these simple steps when hanging or storing your freshly ironed shirts, they will stay wrinkle-free much longer! You do not have to toil for hours in front of an ironing board every week - just follow these instructions and you'll get perfect results every time.

Image from Canva
Frequently Asked Questions
What Type Of Iron Should I Use?
Ironing clothes is an essential part of daily life. It is important to know the right tools and techniques to achieve the best results. Therefore, a frequently asked question when ironing is: which iron should you use? This article provides an answer to that question.
First of all, it is important to know that there are two main types of irons: Steam irons and dry irons. In general, steam irons are more effective at removing wrinkles from clothes quickly and easily. Like a ray of sunshine, they can breathe new life into wrinkled fabrics; however, some fabrics require the gentler treatment of a dry iron. For delicate fabrics such as silk or linen, a dry iron should be used. In addition, it can also be beneficial when ironing seams or wrinkles on heavier fabrics like jeans or wool, as steam can cause them to expand or warp.
When choosing an iron, it is important to consider the features of each model. Features like adjustable temperature settings can make all the difference for different types of fabrics, allowing you to tailor your ironing experience to suit your needs. Moreover, many modern irons come with a number of additional features, such as a self-cleaning system and anti-drip technology, which ensure optimal performance when it comes to eliminating pesky creases.
Ultimately, choosing the right iron for a particular task depends on personal preference and budget. However, knowing which type of iron is best for different fabrics will help you achieve a perfect result every time.
How Can I Prevent My Shirt From Getting Burned?
Ironing shirts can be a difficult task that many people dread. An astonishing 82% of people surveyed said they feel overwhelmed when it comes to ironing their clothes (Mackin et al., 2016). To prevent shirt burn, several steps should be taken before and during ironing.
Before starting ironing, one should make sure that he or she is using the right iron for the task at hand. An ideal iron should have both an adjustable heat setting and a steam function to get the wrinkles out of the shirt without damaging it. It also helps if the soleplate of the iron has a non-stick coating to prevent sticking and burning. Once these steps are complete, it's time to start the actual ironing.
When ironing, there are several techniques that can be implemented in order to prevent burning:
-
Pay attention to temperature: Always start off with a low-temperature setting on your iron and adjust accordingly as needed. Be sure not to leave your iron on any setting for too long or else you may end up scorching your shirt.
- Use steam: Utilizing steam while pressing is a great way to make sure you’re not using too much heat while still achieving crisp edges on collars and cuffs.
- Move quickly: Taking too long over an area may result in burning so it’s best to move quickly but carefully while pressing each section of fabric.
By following these tips and exercising caution when using the iron, you can avoid costly mistakes when tackling your pile of laundry. With patience and practice, even beginners can master this difficult task with ease!
How Often Should I Iron My Shirt?
Ironing a shirt is an art form, and a perfectly ironed shirt can give the impression of professionalism and cleanliness. To achieve this look, it is important to know how often you should iron a shirt. This depends on the type of fabric and the intended use.
You can determine how often you should iron your shirt by observing how quickly it wrinkles after wearing or washing. If you notice that your shirt begins to wrinkle soon after washing, you may need to iron it more often. However, if it looks wrinkle-free for days after wearing or washing, you may be able to iron it less often.
How Often Should I Iron My Shirt?
- Hang your shirts up on hangers as soon as they're dry from washing. This will help prevent wrinkles from forming in the first place.
- Iron any creases or folds before putting the shirt on for extra crispness.
- Place a damp cloth between the iron and the shirt when you press it - this will help smooth out any wrinkles faster and prevent burning spots.
- Be sure to use the right temperature setting for your fabric type - synthetic materials require lower temperatures than natural fibers like cotton or linen.
- Use steam settings when possible - this will help relax any stubborn wrinkles while also keeping them from reappearing too quickly after wearing or washing.
Not only should you know how often to iron a shirt, but you should also follow proper care techniques, such as not using harsh detergents, using a gentle cycle when washing, and avoiding bleach or fabric softener when washing shirts made of delicate fabrics such as silk or wool blends. By taking these measures, you can ensure that your shirts not only look good, but also last longer!
What Is The Best Way To Remove Stubborn Wrinkles?
Ironing is a necessary part of caring for garments, especially shirts. It is important to learn how to properly iron a shirt to ensure that it looks neat and presentable. Removing stubborn wrinkles can be one of the more challenging parts of ironing, but with the right techniques, it is possible to do so effectively.
The most important factor in removing stubborn wrinkles is the proper temperature setting of the iron. Since different fabrics require different temperatures, be sure to read the care label on the shirt before ironing. When using steam, first press firmly on the fabric and then release it while still holding down the steam button on the iron. This will loosen stubborn wrinkles in the fabric and make them easier to remove.
A spray bottle filled with water is also beneficial for stubborn wrinkles. Spray some water on the fabric between ironings, and you will find that the wrinkles are easier to remove. Also, if you place an ironing cloth between your shirt and the iron, you can protect delicate fabrics from burns or damage caused by direct contact with the iron's metal plate. If you take these tips to heart, you should be able to remove even stubborn wrinkles from your shirt with ease when ironing.
How Do I Iron A Shirt Without An Ironing Board?
Ironing clothes is a common household chore. According to the National Fire Protection Association (NFPA), more than 2,000 home fires are caused by irons each year in the United States (NFPA). Therefore, it's important to know proper ironing techniques and safety tips when attempting to iron a shirt without an ironing board.
One technique for removing wrinkles from clothing without an ironing board is to lay the garment apartment on a hard surface such as a countertop or table. Use a damp cloth or spray bottle filled with water before passing the hot iron over the wrinkled area. Apply only light pressure and slowly move the iron back and forth over the fabric. This will prevent scorching or damaging the fabric and give you a smoother result. Also make sure that all buttons are closed so that they don't melt from contact with the hot iron.
To properly iron sleeves without an ironing board, hang them over the edge of your countertop or table and begin ironing from both sides of each sleeve. Start at one end and work your way down from the top, paying careful attention to seams and folds for best results. You should use the same process when ironing collars and cuffs of shirts. Lay larger garments, such as pants or skirts, apartment on a hard surface so that you can move the hot iron freely without bunching the fabric in these areas.
It is possible to achieve professional results in garment wrinkle removal without an ironing board if you follow these steps correctly. With patience and practice, anyone can learn how to remove stubborn wrinkles from their garments while ensuring they are not damaged by heat exposure.
Conclusion
Ironing a shirt can be daunting, but with the right tools, knowledge and techniques, it is possible to achieve professional results. It is important to consider the type of iron used, as some irons are better suited for certain materials than others. To avoid burns, the temperature and setting of the iron should be adjusted according to the instructions for the fabric. If you iron a shirt regularly, it will stay fresh and wrinkle-free longer. Stubborn wrinkles may require additional steps, such as steaming or using a spray bottle to dampen the fabric before ironing. If you do not have an ironing board, you can iron a shirt on an immovable surface like a countertop if you are careful and patient.
In summary, learning how to properly iron a shirt takes some practice, but is relatively easy to accomplish if you know what type of iron to use, how to adjust settings for different fabrics, when to iron, and how to remove stubborn wrinkles. With the right technique and tools, anyone can achieve professional results when ironing their shirts. Finally, even without an ironing board, there are ways to smooth out wrinkles to look professional in any situation.